Appointment Integrations
Postman Sample Request
https://www.getpostman.com/collections/30838307ca7e6cdd3520
It needs to be imported.
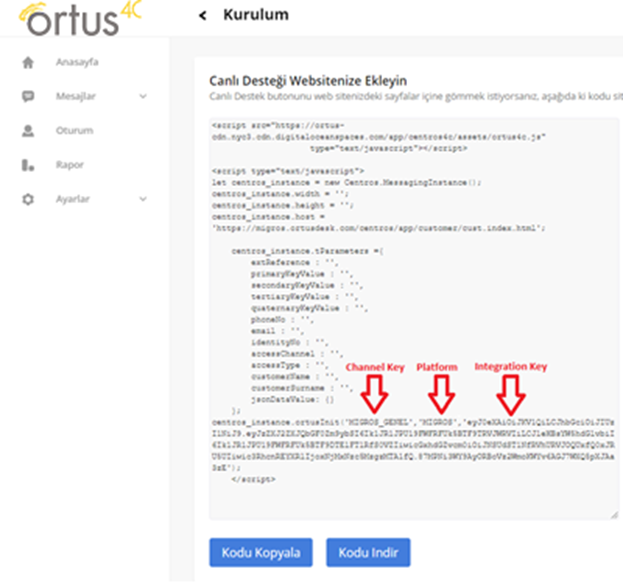
You need to add the integration key, which you can find on the token implementation page in the header.
You can find it in the installation tab of your Admin Panel.
This is fixed for each platform. It will be enough to buy it once.
Adding Key and Value in Postman folder for integration
Url: https://app.ortusdesk.com
Integration_key: It will be taken from the part mentioned on the previous page.
Platform: FLORENCE_NIGHTINGALE
Channel: FLORENCE_NIGHTINGALE_GENEL (EAR_BURUN_BOGAZ_HASTALIKLARI, PSIKOLOGIST etc.)

Service body
{
"catagory": "",
"userLabel": "",
"guestType": "",
"identityNo": "Hasta TCKN",
"identityType": "TCKN",
"extReference": "Dosya No",
"customerName" : "Hasta ad",
"customerSurname" : "Hasta soyad",
"phoneNo": "Hasta tel no",
"email": "Hasta email",
"accessChannel" : "",
This part can be used easily in database registration and inquiries.
"primaryKeyValue": " ORNEK DEGER1 ",
"secondaryKeyValue": " ORNEK DEGER2",
"tertiaryKeyValue": " ORNEK DEGER3",
"quaternaryKeyValue": "ORNEK DEGER4",
It can define new values for parameters according to need. You can use it functionally integrated with your system.
"jsonDataValue": {
"ornekdata1": "ORNEK DATA",
"ornekdata12": "ORNEK DATA1",
"ornekdata3": "ORNEK DATA2",
"ornekdata4" : "ORNEK DATA3"
},
"workChannel": "{{channel}}", “Kanal adınız”
"platform": "{{platform}}", “Platform Adınız”
"expiryDate": 300
}
The token will be valid for the "Seconds" period you set in the "expiryDate" Parameter.
Here you can add parameters as you wish.
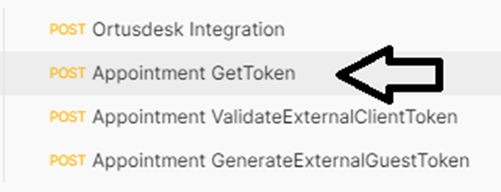
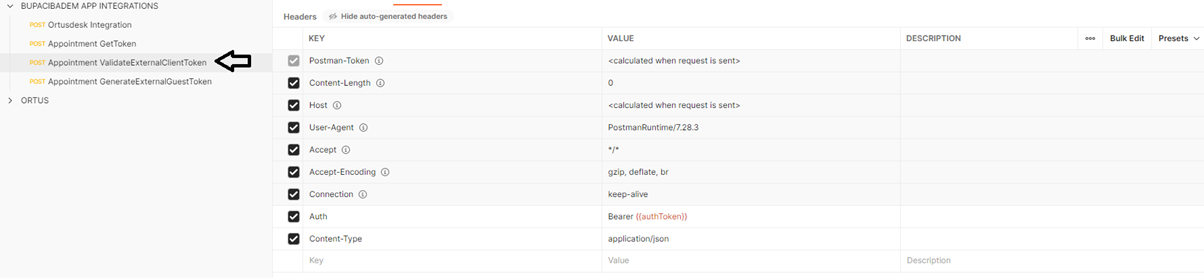
For Auth Token Verification; A post request is sent by setting the token received from the previous service to the "Appointment ValidateExternalClientToken" header.
For Appointment Token Generation; “Appointment GenerateExternalGuestToken” Parameters to the Get token are added to the body part. The token returned by ValidateExternalClientToken is added to the header of this service and the request is sent again.
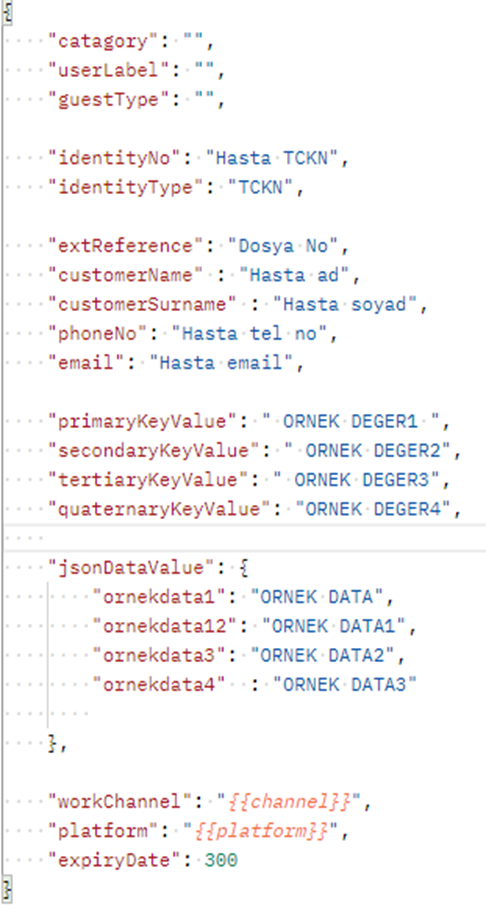
Service body
{
"catagory": "",
"userLabel": "",
"guestType": "",
"identityNo": "Hasta TCKN",
"identityType": "TCKN",
"extReference": "Dosya No",
"customerName" : "Hasta ad",
"customerSurname" : "Hasta soyad",
"phoneNo": "Hasta tel no",
"email": "Hasta email",
This part can be used easily in database registration and inquiries.
"primaryKeyValue": " ORNEK DEGER1 ",
"secondaryKeyValue": " ORNEK DEGER2",
"tertiaryKeyValue": " ORNEK DEGER3",
"quaternaryKeyValue": "ORNEK DEGER4",
It can define new values for parameters according to need. You can use it functionally integrated with your system.
"jsonDataValue": {
"ornekdata1": "ORNEK DATA",
"ornekdata12": "ORNEK DATA1",
"ornekdata3": "ORNEK DATA2",
"ornekdata4" : "ORNEK DATA3"
},
"recaptchaResponse": "sms",
"workChannel": "{{channel}}", “Kanal adınız”
"platform": "{{platform}}", “Platform Adınız”
"expiryDate": 300
}
The token will be valid for the "Seconds" period you set in the "expiryDate" Parameter.
Here you can add parameters as you wish.
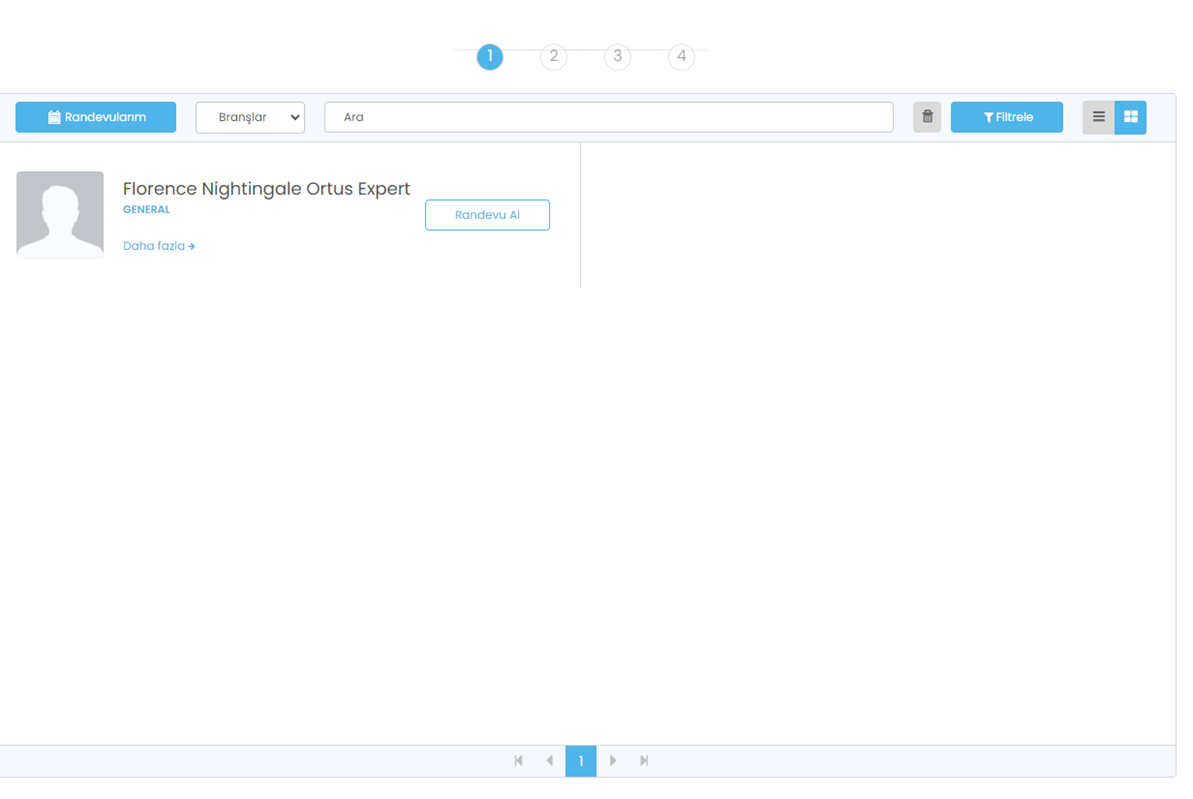
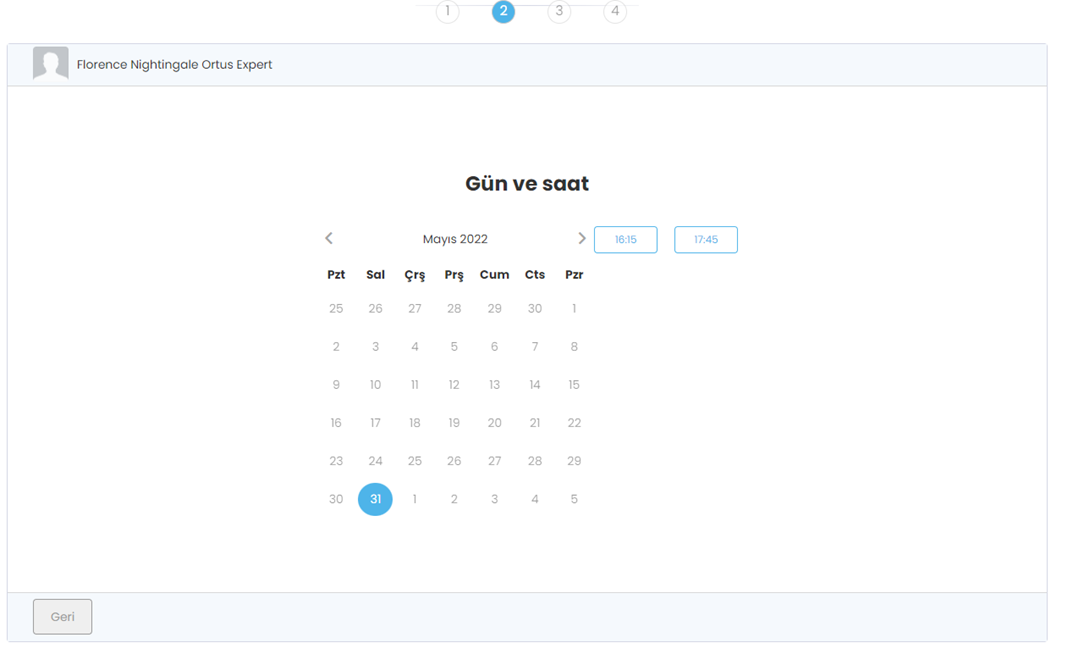
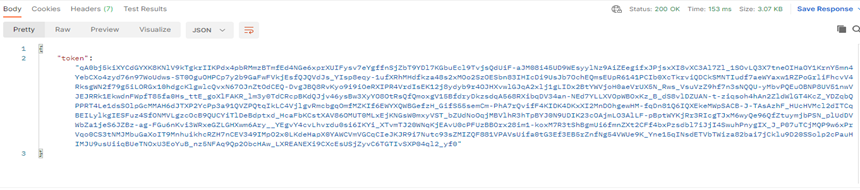
Testing the Appointment Screen
The token response value we received
You can use it by logging in from the browser by replacing “/TOKEN” at https://appointment.ortusdesk.com/#/agents/token.